Spring REST Docs는 RESTful 서비스를 정확하고 읽기 편하게 문서화하는 것을 돕는 것이다. 테스트 기반의 접근법은 서비스에 대한 문서화의 정확도를 보장해주고, 테스트가 실패할 경우 문서화가 되지 않는다.
REST Docs 장점
- curl 과 http request snippets이 생성된다.
- snippets 정보를 쉽게 추가 할 수 있다.
- 프로젝트 jar파일에 문서를 쉽게 패키지 할 수 있다.
- JSON 과 XML 을 지원한다.
- 비지니스 로직과 일치한 API 문서
구조
빌드 설정(Bulid Configuration)
1 | <dependency> |
spring-restdocs-mockmvc의 test범위에 의존성 추가- Asciidoctor 플러그인 추가
prepare-package사용하면 문서가 패키지에 포함될 수 있다.- spring-restdocs-asciidoctorAsciidoctor 플러그인의 의존성 추가. 이렇게하면 파일 snippets에 사용할 속성
.adoc을 가리 키도록 자동으로 구성 된다.target/generated-snippets또한operation블록 매크로 를 사용할 수 있다.
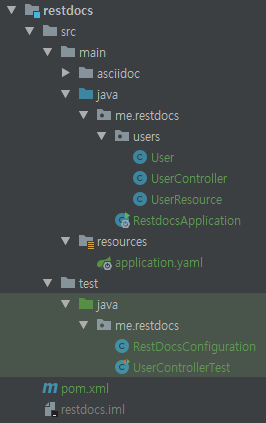
User REST API 추가(me.restdocs.users 패키지 생성)
User 추가
1 |
|
UserResource 추가
Spring HATEOAS를 사용해서 self-description하게 적용한다.(Spring HATEOS 참조)1
2
3
4
5
6
7public class UserResource extends Resource<User> {
public UserResource(User user, Link... links) {
super(user, links);
add(linkTo(UserController.class).slash(user.getId()).withSelfRel());
}
}
UserController 추가
1 |
|
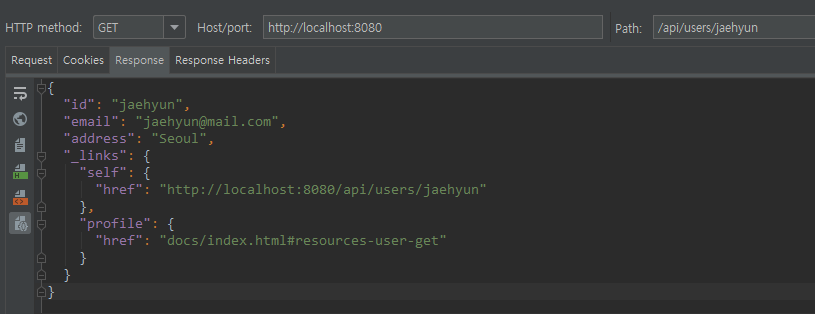
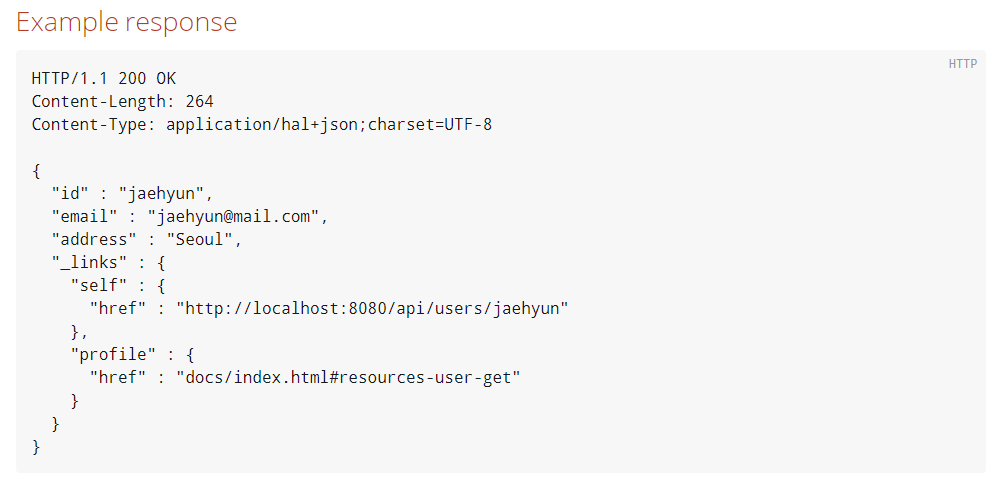
API 호출 결과 화면
문서 패키징(Packaging the documentation)
생성된 문서를 프로젝트의 jar 파일에 패키지화 할 수 있다.1
2
3
4
5
6
7
8
9
10
11
12
13
14
15
16
17
18
19
20
21<plugin> <!-- 1 -->
<artifactId>maven-resources-plugin</artifactId>
<version>2.7</version>
<executions>
<execution>
<id>copy-resources</id>
<phase>prepare-package</phase>
<goals>
<goal>copy-resources</goal>
</goals>
<configuration> <!-- 2 -->
<outputDirectory>${project.build.outputDirectory}/static/docs</outputDirectory>
<resources>
<resource>
<directory>${project.build.directory}/generated-docs</directory>
</resource>
</resources>
</configuration>
</execution>
</executions>
</plugin>
- Maven Resources 플러그인 추가
- 생성 된 문서를 static/docs jar 파일에 포함될 빌드 출력 디렉토리로 복사
테스트 설정(Test Configuration)
Test Class에 @AutoConfigureRestDocs와 @AutoConfigureMockMvc 추가
1 | (SpringRunner.class) |
@AutoConfigureMockMvc는 MockMvc로 Test하기@AutoConfigureRestDocs는 Spring REST Doc의 자동 설정을 사용users-get으로 snippet 생성하여 응답 링크 생성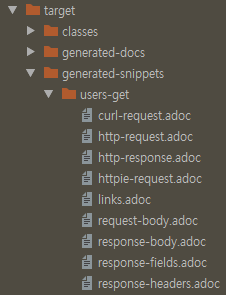
- 추가 사용방법
- requestParameters() + parameterWithName()
- pathParameters() + parametersWithName()
- requestParts() + partWithname()
- equestPartBody()
- requestPartFields()
- requestHeaders() + headerWithName()
- requestFields() + fieldWithPath()
- responseHeaders() + headerWithName()
- responseFields() + fieldWithPath()
opertarion index.adoc 파일에 추가
bulid 한 Rest docs snippet을 operation 명령어로 연동하기 위해서는 src/main/asciidoc/index.adoc 파일에 추가1
2
3
4
5
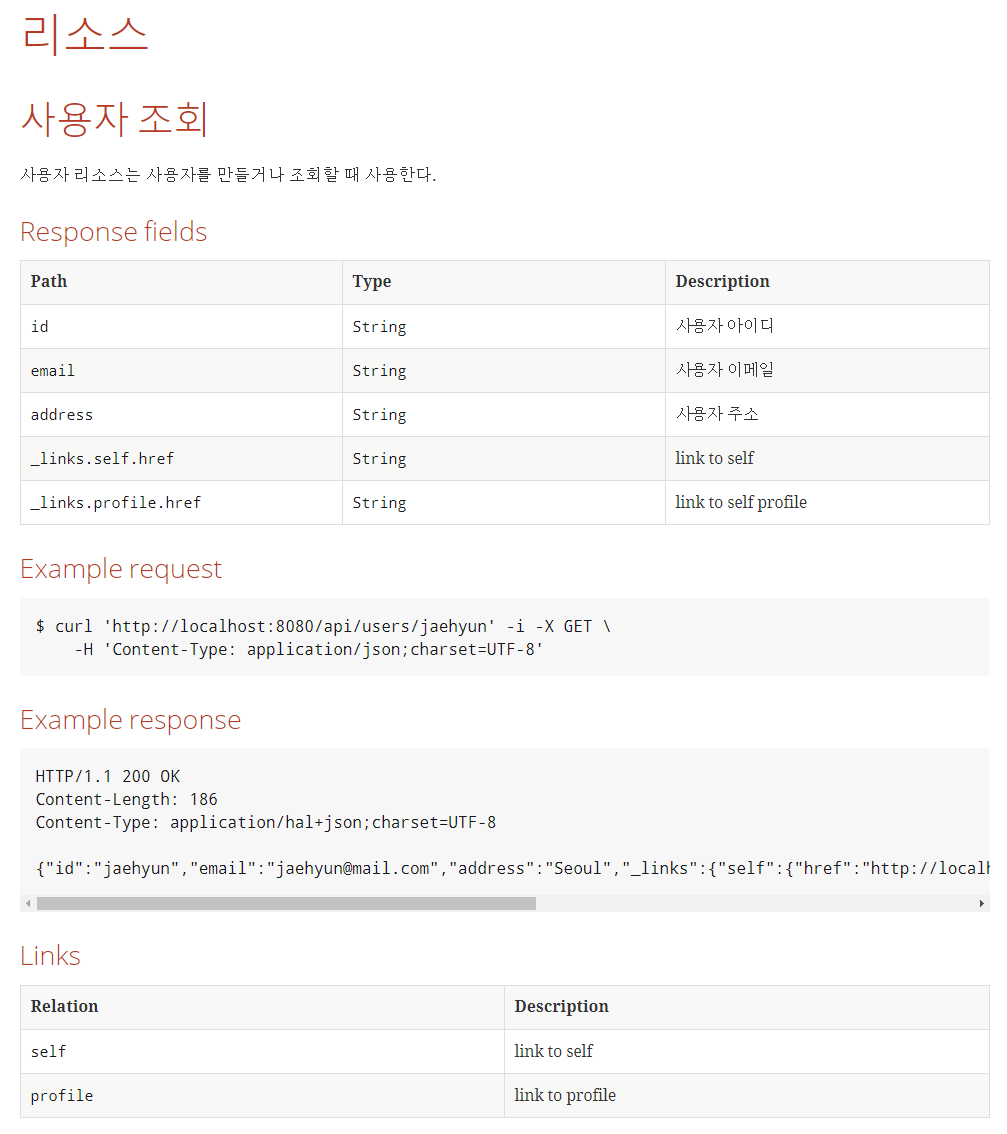
6[[resources-user-get]]
== 사용자 조회
사용자 리소스는 사용자를 만들거나 조회할 때 사용한다.
operation::users-get[snippets='response-fields,curl-request,http-response']
실행 방법
- mvn package
- http://localhost:8080/docs/index.html 접속
결과 화면
Customizing requests and responses
요청이나 응답에 대한 json 형식으로 pretty 하게 출력
전처리기 설정
@TestConfiguration 테스트에서만 작동하는 설정 어노테이션 추가 하고, 전처리기 설정을 withRequestDefaults(prettyPrint()), withResponseDefaults(prettyPrint());로 오버라이딩1
2
3
4
5
6
7
8
9
10
public class RestDocsConfiguration {
public RestDocsMockMvcConfigurationCustomizer restDocsMockMvcConfigurationCustomizer() {
return configurer -> configurer.operationPreprocessors()
.withRequestDefaults(prettyPrint())
.withResponseDefaults(prettyPrint());
}
}
@Import(RestDocsConfiguration.class) 를 이용해서 RestDocsConfiguration.class 추가
1 | (SpringRunner.class) |
결과 화면
소스코드