Spring Boot 웹 응용 프로그램은 내장 웹 서버를 포함한다. 여기서 임베디드 서버 구성 및 변경하는 방법에 대해서 설명한다.
내장 웹 서버 이해
Spring Boot에 spring-boot-autoconfigure자동 설정 확인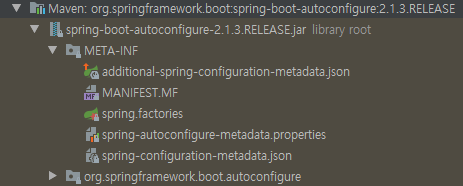
spring.factories 에 org.springframework.boot.autoconfigure.web.servlet.ServletWebServerFactoryAutoConfiguration,\자동 설정이 되어 있는걸 확인 할 수 있다.1
2
3...
org.springframework.boot.autoconfigure.web.servlet.ServletWebServerFactoryAutoConfiguration,\
...
ServletWebServerFactoryAutoConfiguration.java에서 EmbeddedTomcat, EmbeddedJetty, EmbeddedUndertow의 자동 설정부분이 Import 되어 있어서 내장 웹 서버가 자동으로 구동 된다.1
2
3
4
5
6
7
8
9
10
11
12
(Ordered.HIGHEST_PRECEDENCE)
(ServletRequest.class)
@ConditionalOnWebApplication(type = Type.SERVLET)
(ServerProperties.class)
@Import({ ServletWebServerFactoryAutoConfiguration.BeanPostProcessorsRegistrar.class,
ServletWebServerFactoryConfiguration.EmbeddedTomcat.class,
ServletWebServerFactoryConfiguration.EmbeddedJetty.class,
ServletWebServerFactoryConfiguration.EmbeddedUndertow.class })
public class ServletWebServerFactoryAutoConfiguration {
...
}
다른 서블릿 컨테이너 사용하기
Spring Boot는 기본 서블릿 컨테이너가 Tomcat이다. 이를 변경하기 위해서는 Tomcat의 종속성을 제거하고, 원하는 서블릿 컨테이너(Netty, Undertow) 추가해주면 된다.
Maven Dependency
1 | <dependencies> |
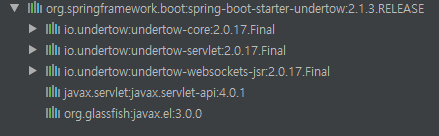
Undertow의존성 확인
Unsertow동작 확인

웹 서버 비활성화
Spring Boot 서블릿 컨테이너가 의존성 주입이 되어 있는데 동작을 하지 않게 하는 방법이다.1
2
3spring:
main:
web-application-type: none
포트 변경
1 | server: |
랜덤 포트 변경
사용하지 않는 포트를 찾아 포트 변경1
2server:
port: 0
웹 서버 기동시 port 포트 확인
웹 서버가 생성이 되면 ApplicationListener<ServletWebServerInitializedEvent>가 호출이 된다. getApplicationContext 인스턴스를 생성 후 포트 정보를 확인하면 된다.1
2
3
4
5
6
7
8
9
public class PortListener implements ApplicationListener<ServletWebServerInitializedEvent> {
public void onApplicationEvent(ServletWebServerInitializedEvent servletWebServerInitializedEvent) {
ServletWebServerApplicationContext applicationContext = servletWebServerInitializedEvent.getApplicationContext();
System.out.println(applicationContext.getWebServer().getPort());
}
}
동작 확인
ssl 적용
ssl 적용하기 위해서는 keystore를 생성해야 된다.
keystore 생성
1 | $ keytool -genkey -alias tomcat -storetype PKCS12 -keyalg RSA -keysize 2048 -keystore keystore.p12 -validity 4000 |
keystore 생성 확인
application.yaml을 이용해서 SSL 등록 정보를 설정
application.yaml
1 | server: |
ssl 확인

소스코드