프론트엔드 개발에 Node.js 가 필요한 이유


Node.js를 백엔드 구현체로 사용하지 않고, 프론트 엔드 개발을 할때 개발 환경에 대한 이해를 하기 위해 작성하였다.

Node.js 설치

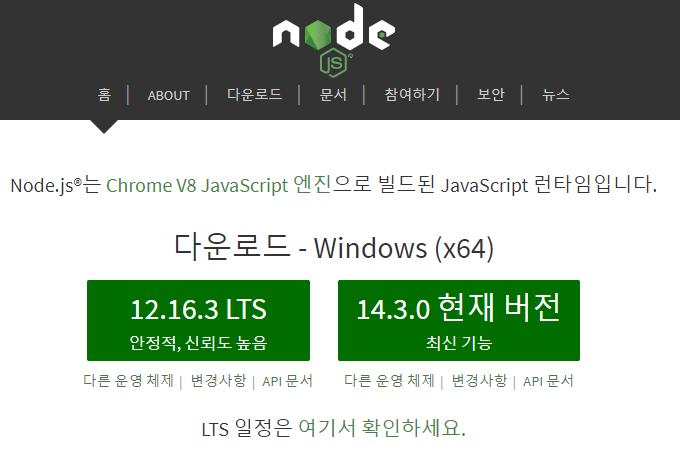
  1. https://nodejs.org/ko/ 사이트 가서 노드의 최신 버전을 다운로드

LTS 버젼은 안정적인 버젼으로 Java에서도 대부분 LTS 버젼을 많이 사용한다. (Current 버전은 최신 기술을 테스트할 때 개발 서버에서만 사용하길 권장한다.)

  1. 설치는 Next버튼을 눌러 완료 하면 된다.

  2. cmd 실행

1
2
3
4
5
$ node
Welcome to Node.js v12.16.3.
Type ".help" for more information.
> 1 + 1
2

정수를 계산하면 입력된 결과 값이 나온다. 즉, 자바스크립의 코드를 입력하면 즉시 결과를 확인 할 수 있다.

  1. Node.js 버젼 확인
    node 실행 창을 나오는 명령어는 .exitctrl + c를 연속 두번 입력하면 된다.
1
2
$ node --version
v12.16.3
  1. NPM(Node Package Manage) 확인
1
2
3
4
5
6
7
8
9
10
11
12
13
14
15
16
17
18
19
20
21
22
23
24
25
26
27
28
$ npm

Usage: npm <command>

where <command> is one of:
access, adduser, audit, bin, bugs, c, cache, ci, cit,
clean-install, clean-install-test, completion, config,
create, ddp, dedupe, deprecate, dist-tag, docs, doctor,
edit, explore, fund, get, help, help-search, hook, i, init,
install, install-ci-test, install-test, it, link, list, ln,
login, logout, ls, org, outdated, owner, pack, ping, prefix,
profile, prune, publish, rb, rebuild, repo, restart, root,
run, run-script, s, se, search, set, shrinkwrap, star,
stars, start, stop, t, team, test, token, tst, un,
uninstall, unpublish, unstar, up, update, v, version, view,
whoami

npm <command> -h quick help on <command>
npm -l display full usage info
npm help <term> search for help on <term>
npm help npm involved overview

Specify configs in the ini-formatted file:
C:\Users\jaehy\.npmrc
or on the command line via: npm <command> --key value
Config info can be viewed via: npm help config

npm@6.13.2 C:\Users\jaehy\AppData\Roaming\npm\node_modules\npm
  1. NPM 버젼 확인
1
2
$ npm --version
6.13.2

프로젝트 초기화

외부 라이브러리를 다운로드하고 빌드 하는 등 명령어를 자동화하여 프로젝트를 관리하는 도구가 존재하는데, 예를 들어 자바의 Maven, Gradle이 있다.
NPM은 자바스크립트의 빌드 도구 이다.

INIT

NPM에 init 명령을 사용하여 프로젝트를 생성(sample이라는 폴더를 생성하여 실행) 하면 pacakge.json파일이 생성 된다.

1
2
3
4
5
6
7
8
9
10
11
12
13
14
15
16
17
18
19
20
21
22
23
24
25
26
27
28
29
30
31
32
33
34
35
36
$ npm init
This utility will walk you through creating a package.json file.
It only covers the most common items, and tries to guess sensible defaults.

See `npm help json` for definitive documentation on these fields
and exactly what they do.

Use `npm install <pkg>` afterwards to install a package and
save it as a dependency in the package.json file.

Press ^C at any time to quit.
package name: (sample)
version: (1.0.0)
description:
entry point: (index.js)
test command:
git repository:
keywords:
author:
license: (ISC)
About to write to E:\97.private_work\sample\package.json:

{
"name": "sample",
"version": "1.0.0",
"description": "",
"main": "index.js",
"scripts": {
"test": "echo \"Error: no test specified\" && exit 1"
},
"author": "",
"license": "ISC"
}


Is this OK? (yes)

npm init -y 명령어를 사용하면 질문을 스킵하고 package.json 파일이 생성된다.

Package.json

Node.js 는 Package.json 파일에 모든 프로젝트 정보를 기록한다.

정보명 설명
name 프로젝트 이름
version 프로젝트 버전 정보
description 프로젝트 설명
main 노드 어플리케이션일 경우 진입점 경로
scripts 프로젝트 명령어를 등록
author 작성자
license 라이센스

프로젝트 명령어

package.json

1
2
3
4
5
6
7
8
9
10
11
{
"name": "sample",
"version": "1.0.0",
"description": "",
"main": "index.js",
"scripts": {
"test": "echo \"Error: no test specified\" && exit 1"
},
"author": "",
"license": "ISC"
}

script 에 test 명령어 실행하면 echo \"Error: no test specified\" && exit 1 출력 되는 것을 확인 할 수 있다.

1
2
3
4
5
6
7
$ npm test

> sample@1.0.0 test E:\97.private_work\sample
> echo "Error: no test specified" && exit 1

"Error: no test specified"
npm ERR! Test failed. See above for more details.

NPM에서 사용할 수 있는 명령어가 있는데, 대부분 start, test, install, uninstall을 많이 사용 한다.

1
2
3
4
5
6
7
8
9
10
11
12
13
14
15
16
$ npm

Usage: npm <command>

where <command> is one of:
access, adduser, audit, bin, bugs, c, cache, ci, cit,
clean-install, clean-install-test, completion, config,
create, ddp, dedupe, deprecate, dist-tag, docs, doctor,
edit, explore, fund, get, help, help-search, hook, i, init,
install, install-ci-test, install-test, it, link, list, ln,
login, logout, ls, org, outdated, owner, pack, ping, prefix,
profile, prune, publish, rb, rebuild, repo, restart, root,
run, run-script, s, se, search, set, shrinkwrap, star,
stars, start, stop, t, team, test, token, tst, un,
uninstall, unpublish, unstar, up, update, v, version, view,
whoami

package.json에 커스텀으로 등록한 명령어 실행

1
2
3
4
5
6
{
"scripts": {
"test": "echo \"Error: no test specified\" && exit 1",
"bulid" : "빌드 실행"
}
}
1
2
3
4
 npm run bulid

> sample@1.0.0 bulid E:\97.private_work\sample
> 빌드 실행

패키지 설치

npm install 명령어로 외부 패키지를 프로젝트 폴더에 다운로드하여 package.json에 정보를 기록한다.

1
$ npm install react
1
2
3
4
5
{
"dependencies": {
"react": "^16.13.1"
}
}

16.13.1 버전을 설치

^16.13.1
16은 Major Version으로 기존 Version 과 호환되지 않게 변경
13은 Minor Version으로 기존 Version 과 호환되면서 기능이 추가
1은 Patch Version으로 기존 버전과 호환되면서 버그를 수정

버전의 범위

단순 버전 관리

1
16.13.1

특정 버전보다 높거나 낮을 경우

1
2
3
4
>16.13.1
>=16.13.1
<16.13.1
<=16.13.1

틸드(~)와 캐럿(^)을 이용해 범위

1
2
~16.13.1
^16.13.1

~는 Patch Version을 변경 즉, 16.13.1에서 1을 변경
^은 Minor Version, Patch Version을 변경 즉, 16.13.1에서 13과 1을 변경

참조